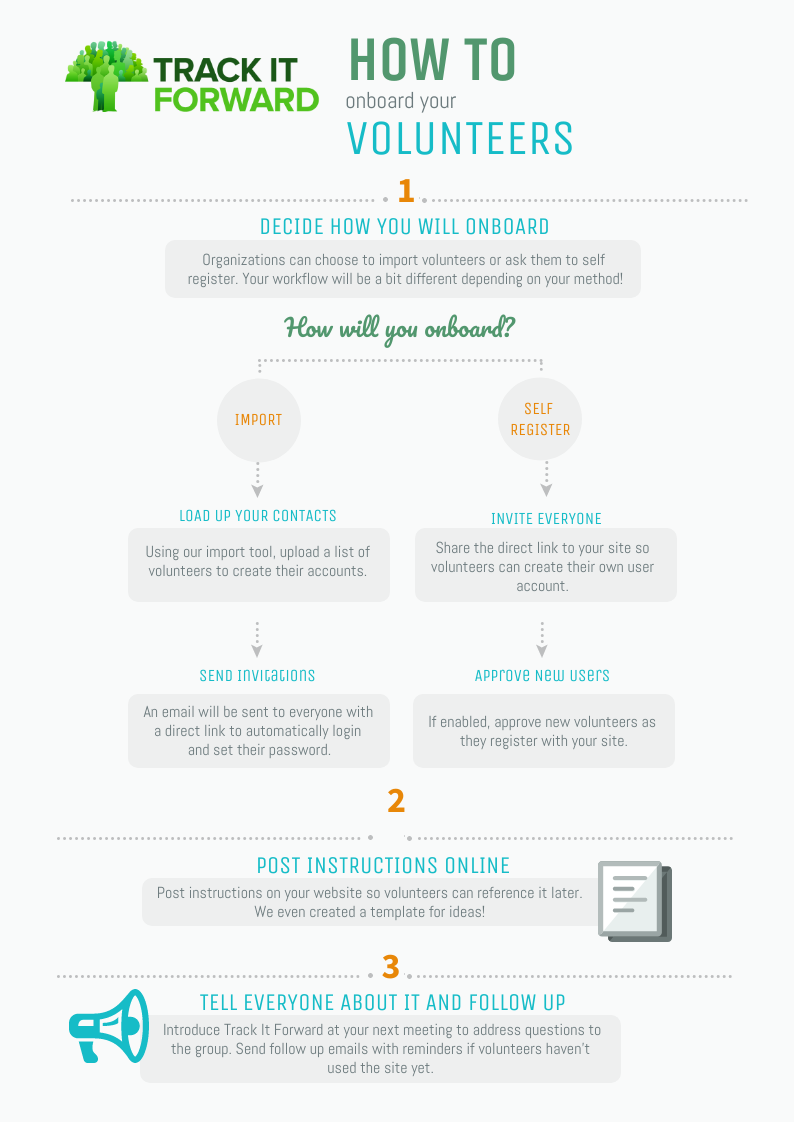
Once you decide the best method for adding volunteers to your site, you can implement Track It Forward with your organization. Depending on your program, you might onboard volunteers during your free trial period or wait until you’ve officially implemented Track It Forward into your workflow.
1: Decide How to Onboard
Import Volunteers
Using the import tool on the Volunteers page allows you to quickly create accounts on behalf of volunteers by uploading a list from a spreadsheet. You will just need to make sure that the data on your spreadsheet matches up with each field on the volunteer profile (Ex. first name, last name, email address). If you don’t know all of the profile details, you will need to leave that space blank on the spreadsheet and the volunteer can complete it later.
After the accounts are created, you can send an invitation to notify volunteers that they’ve been added to the site. The invitation email can be sent from the Volunteers page using the choose-an-action dropdown menu after selecting the volunteers you want to notify. The invitation email will include a direct link to their user account so they can log in and update their password.
Tips for Success
Let volunteers know that you will be creating the user account on their behalf and when they should expect the invitation email with their access link. As the site manager, you can review the Volunteers page for the Last Accessed Date to see if/when volunteers sign in successfully.
Self Register
If you want volunteers to self-register, you will need to share the direct link to your site on Track It Forward. This link can be found on your Promote page and it will prompt volunteers to complete the custom profile questions that you’ve selected for your site.
This link can be shared via email, social media, or your website. If you have new user approval enabled, you will need to approve volunteers as they sign up with your site. You will see a notification of pending volunteers on the Overview page of your Organizer Dashboard under the Report Summary section.
Tips for Success
If your organization has new user approval enabled, let volunteers know that their account may not be approved right away. Based on your site settings, this may limit their access to the event calendar and charts.
2: Post Instructions Online
We recommend posting information for volunteers on your website so they can access it at any time. In addition to the direct link to your site, you may want to include instructions for logging hours, contact information, and video tutorials. We created a template site to give you some ideas. Feel free to link over to our help articles for volunteers!
3: Tell Everyone About It and Follow Up
If possible, introduce Track It Forward at a meeting so volunteers can ask questions in a group instead of sending separate emails. Let volunteers know when the program is being rolled out, how it works, and what they should expect. You can even take them through a short demo or show them a screen recording of the software.
It has been proven that volunteers are more motivated to do tasks when they know how it is impactful. So, let your volunteers know how tracking their hours will be helpful to the organization.
Make a plan to follow up with volunteers, as needed, to get everyone onboarded in a timely manner. Continue following up with volunteers and reminding them to log hours until everyone is comfortable using the site.
 Last updated by