Importing students is the quickest way to upload all of your volunteers at one time. You also have the option of letting them self-register or adding them manually. For directions on other options, you can go to our Knowledge Base.
To import new students:

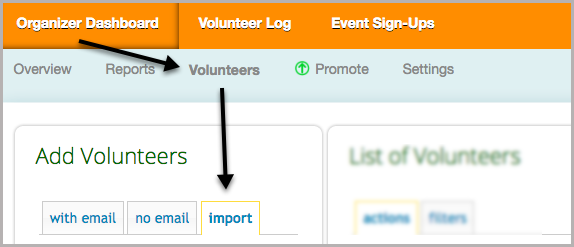
1. Open your Organizer Dashboard
2. Open the Volunteers page
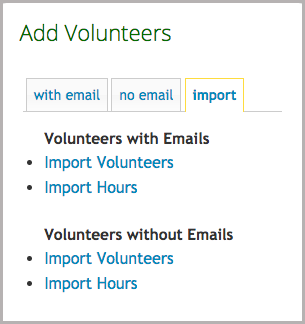
3. On the left hand side of the screen, under Add Volunteers select the Import tab.

4. Select the link that applies
Import Volunteers With Email: Students with email addresses that will have their own user accounts to log hours
Import Volunteers Without Email: Students without email addresses who will need an organizer to log their hours for them.
5. On the next page, you will see instructions on how to import your users.

6. Create a spreadsheet (in Microsoft Excel, Google Spreadsheets, Apple Pages etc) and list all of the profile fields that are currently in the system. The instructions will list the order of those fields for you.
7. Fill out all the cells, then copy all of the data (EXCEPT the titles)

8. Paste the data into the text box on the Track it Forward website, then click on Validate

If there are any errors, the system will highlight where the issue is. (In this case, the Username isn’t unique. So you can modify it in the text field and then click Validate to rerun the form.)

If there are no errors, the system will let you know the number of users that will be imported when you click submit.
![]()
After you click submit, you will be notified of how many students were added to your site.
And Voila!!!!
Next in this series: Part 3/3: Set the Time Frame
 Last updated by